There is a good ending to this story, but it took a while to get there.
For the video of these instructions, you can scroll down to the end of this post.
If you’ve purchased a Mecharm 270 Pi, or are thinking about it, read on for my experience. Spoiler Alert: it’s a great compact robot with high-end servo motion, but the initial set-up using manufacturer’s instructions can be a bit confusing.
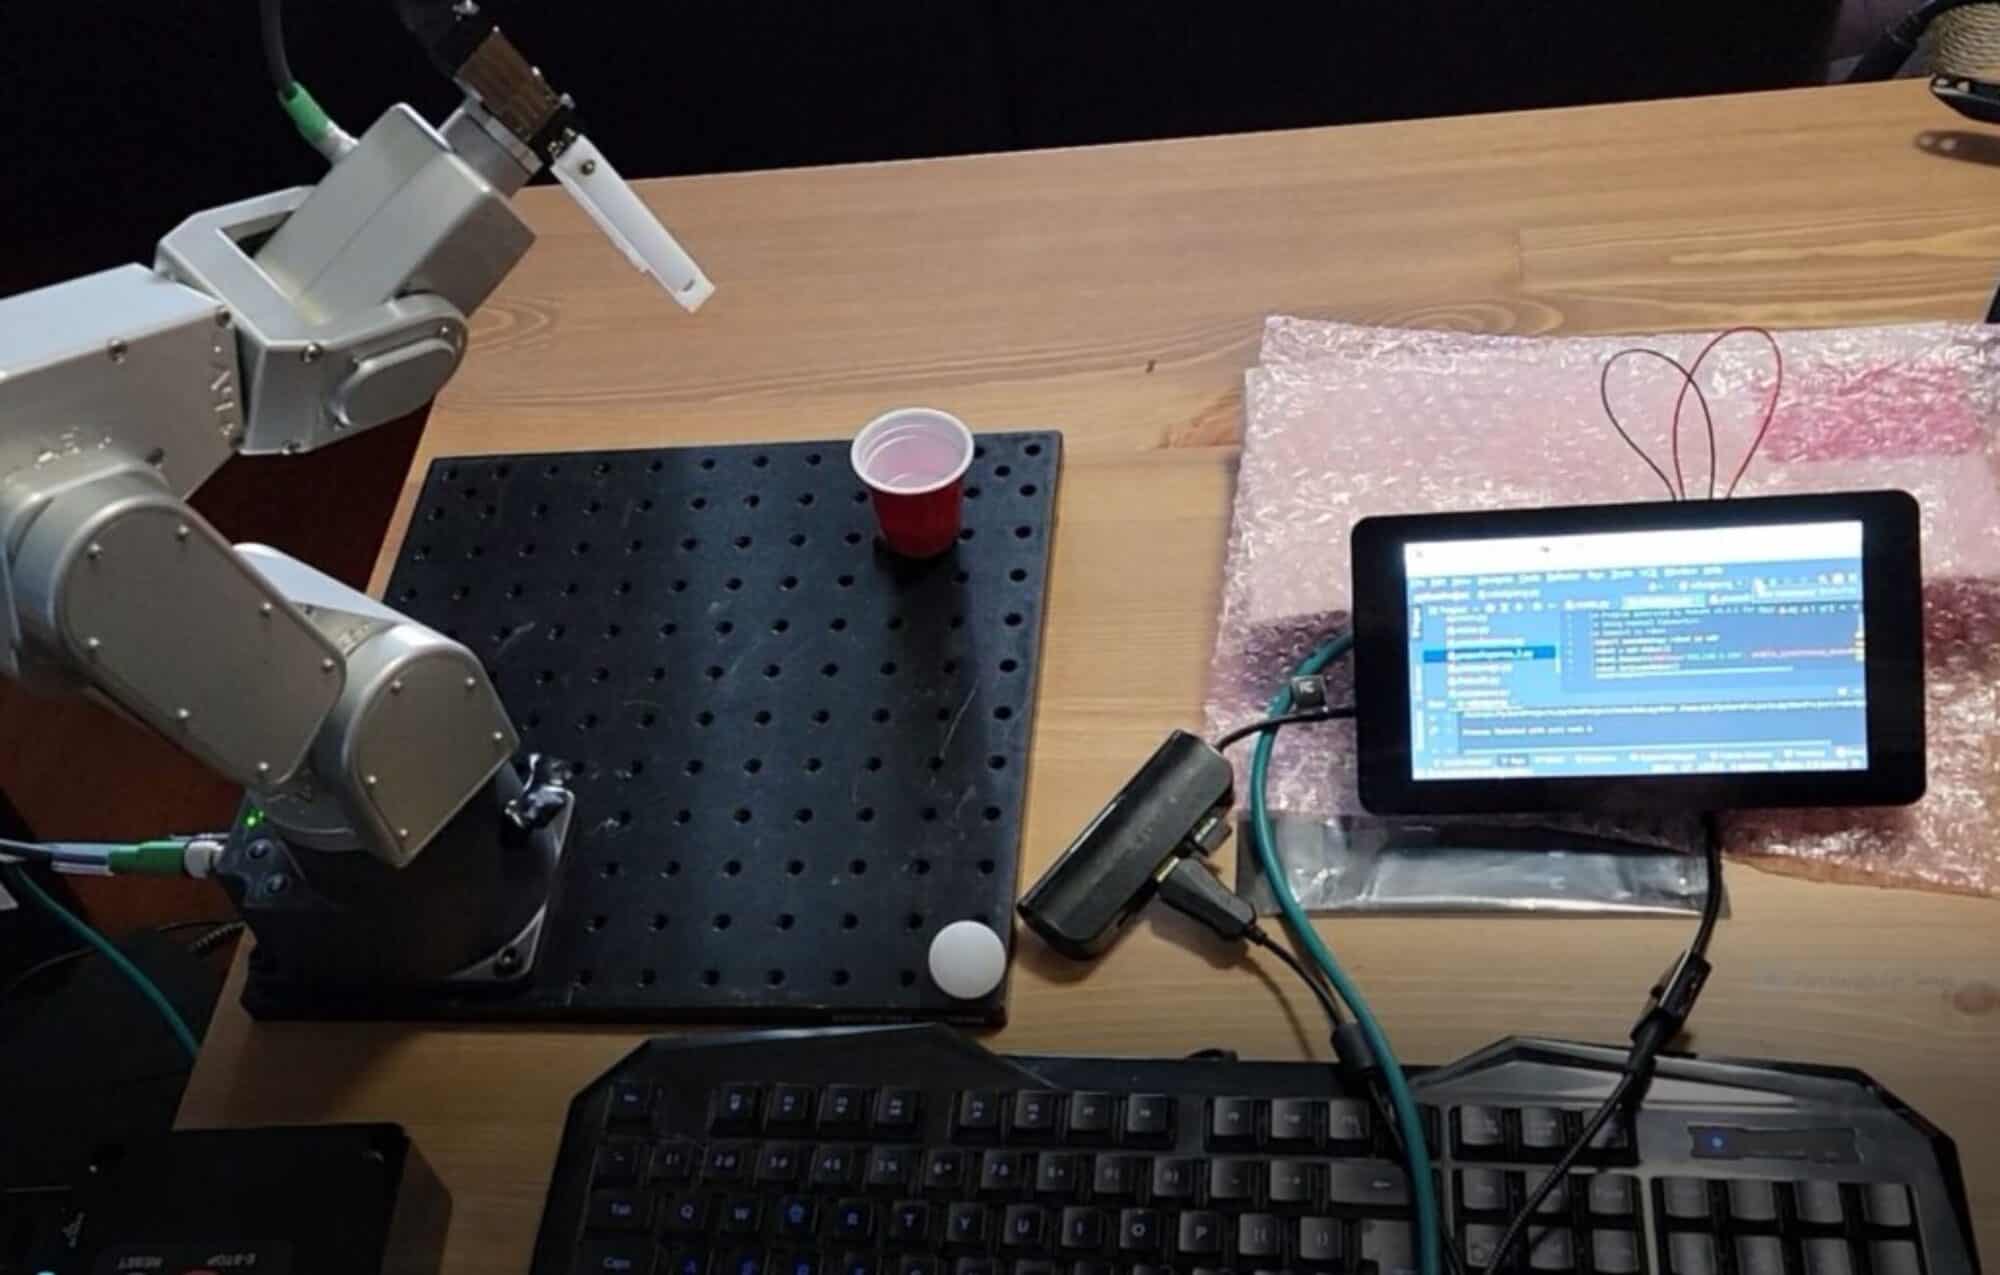
The Pi edition of this robot has a Raspberry Pi 4 built in to the base. The Raspberry Pi 4 is basically a small computer running a Linux operating system.
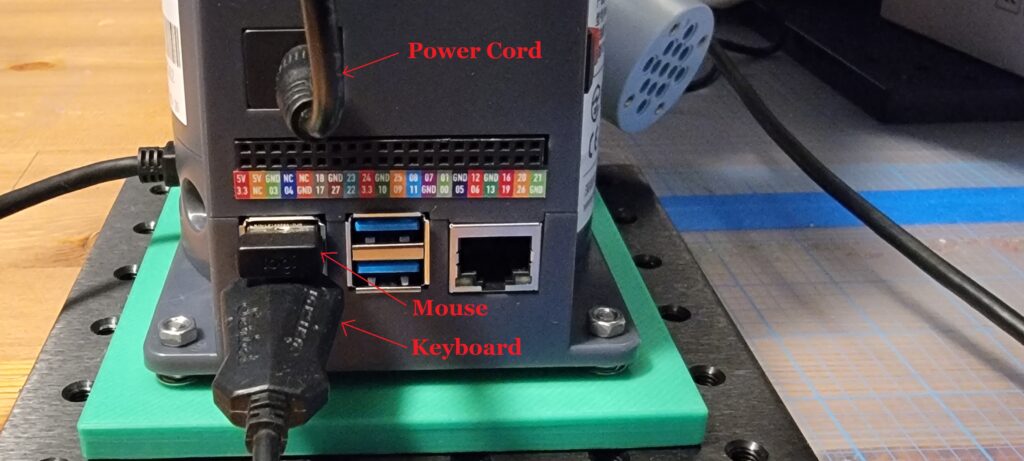
To get started with your Mecharm 270 Pi, you’ll need a keyboard, mouse, and monitor to plug in.
This is a great package deal for all 3:
HDMI monitor + USB keyboard & mouse
Separately:
compact USB keyboard
I use an ergonomic mouse pad which reduces the strain on your wrist:
Ergonomic Mouse Pad with Wrist Support
Good quality HDMI monitor
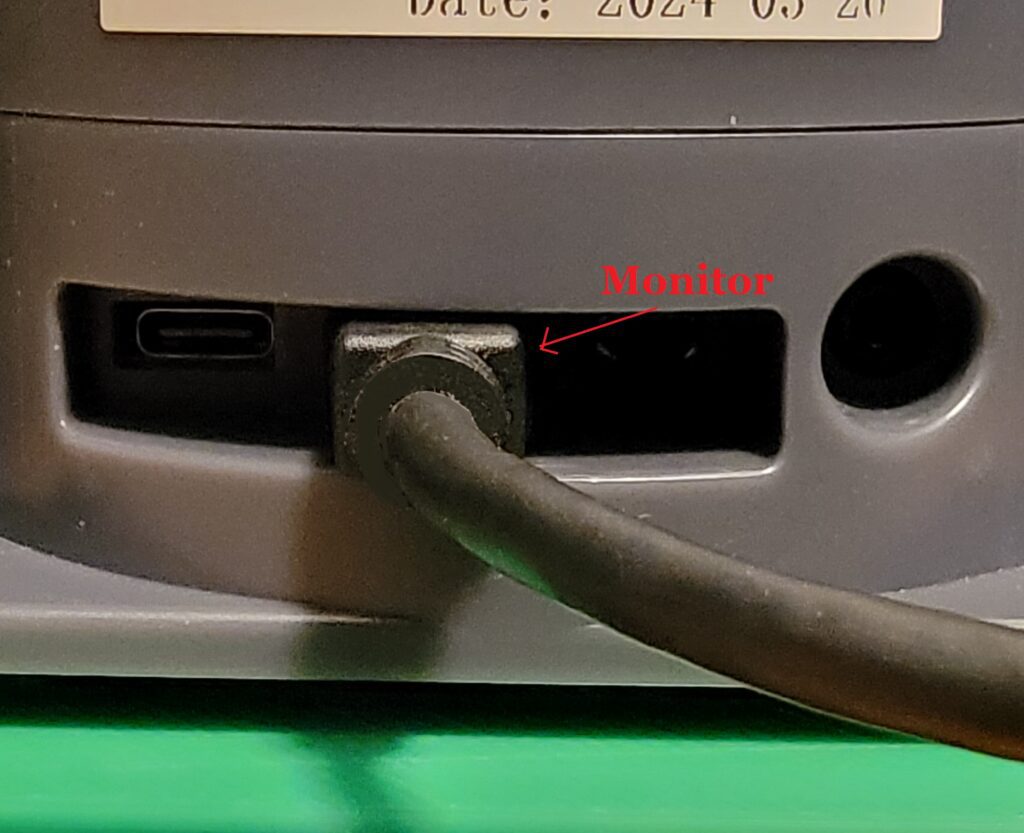
DON’T FORGET THE MONITOR CABLE!
The Mecharm 270 Pi monitor port is a micro-HDMI. With an HDMI monitor, you’ll need an HDMI to micro-HDMI cable
Connect them like this:
When power is switched on, the Pi boots up and the monitor displays this screen:
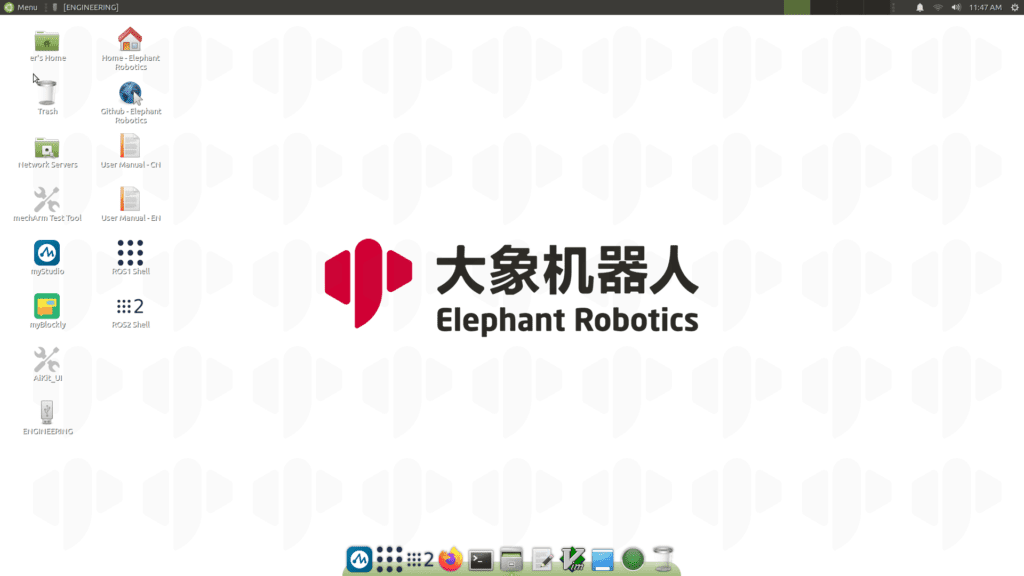
My Mecharm 270 Pi shipped in April 2024. Older or newer vintages may not behave in exactly the same way but this is what I did to be able to move the arm using the pre-installed “myBlockly” app:
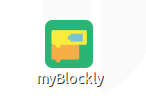
Click on the myBlockly icon on the desktop
The first time I opened the app, it was defaulted to Mandarin. Change it by clicking on the blue dropdown menu, select the gear icon (bottom of dropdown) to open the Settings window:
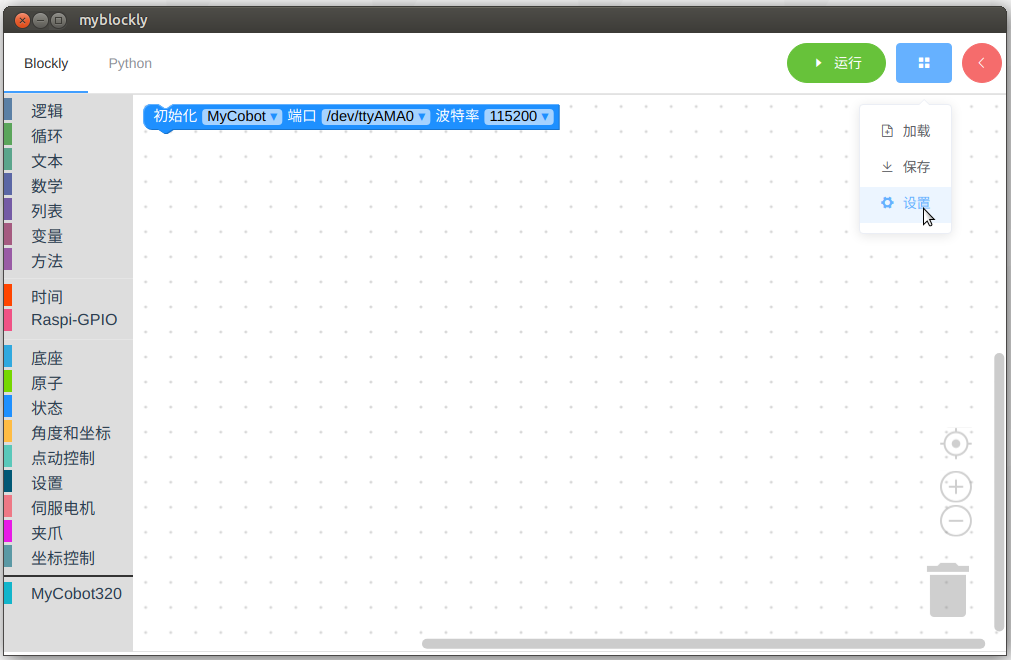
In the window that opens, click on the dropdown arrow of the top box:
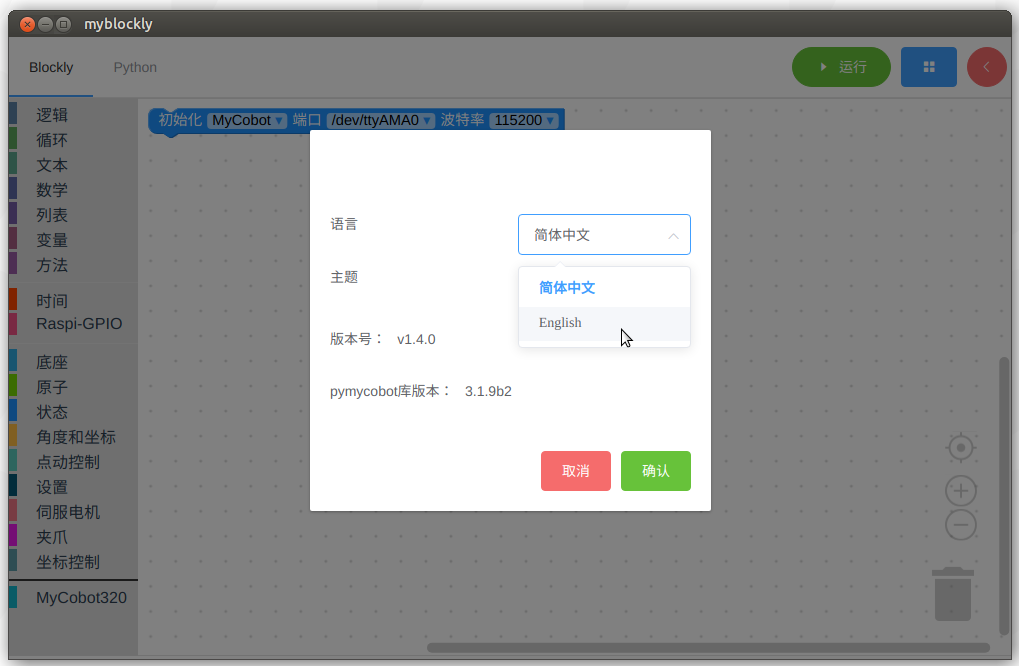
Choose “English” to change the app from Mandarin to English. Click the green box to close the window. It will default to English now each time the app is opened.
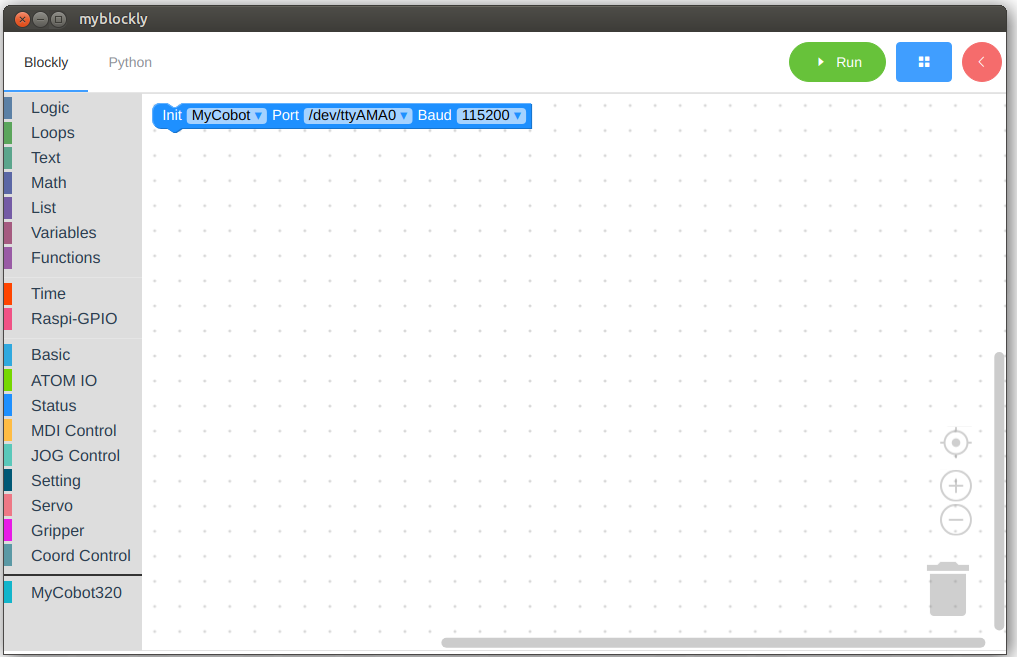
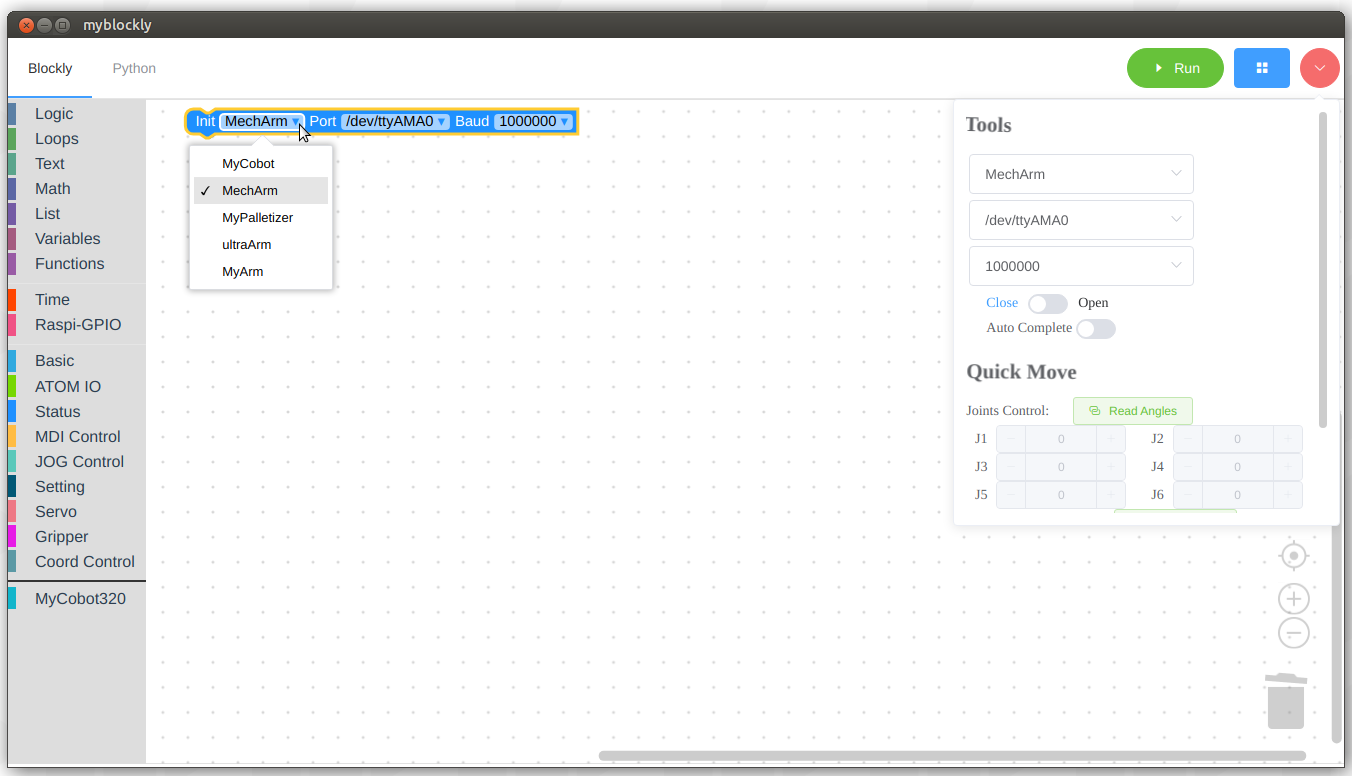
To connect to the Mecharm, the blue initialization block needs to be set to Mecharm, /dev/ttyAMAO, and 1000000 using the blue dropdown arrows.
Once that is set up, you can add motion blocks. Select “MDI Control” on the left menu. It will open a selection of blockly commands. Click once on the one which starts, “Set Angle J1):
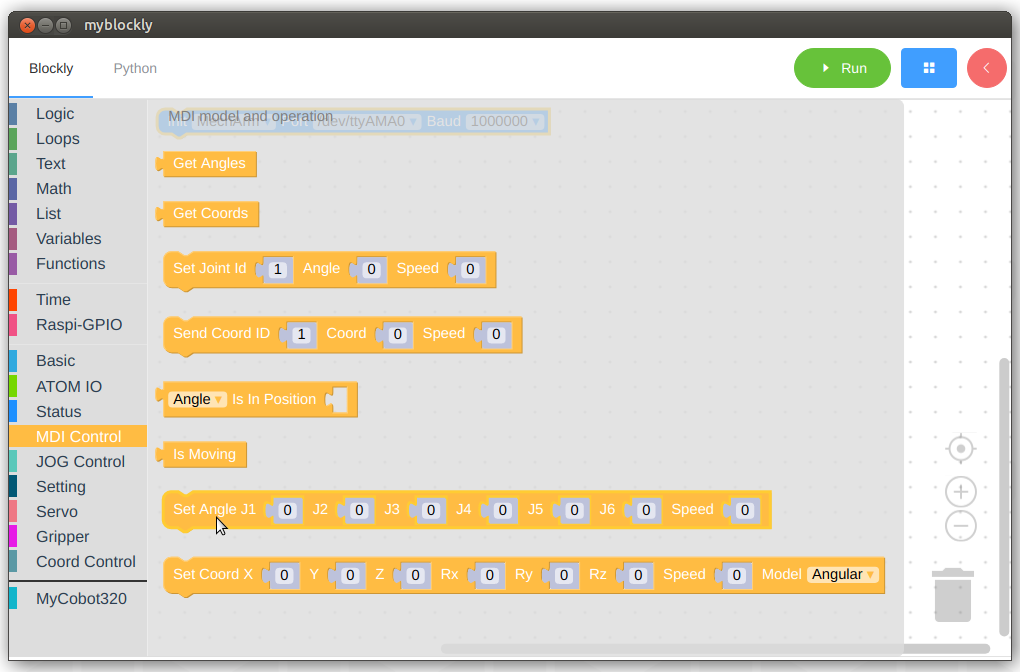
A Set Angle command block will be added to the programming screen.
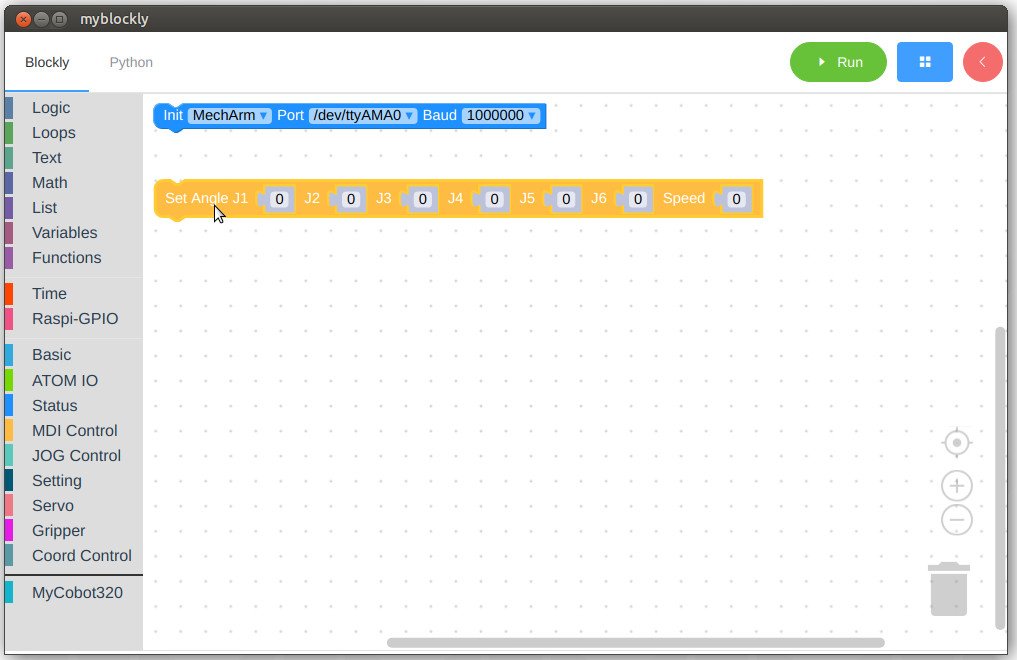
It’s a good idea to start small; Check functionality by setting Angle J1 to something between 24 – 50 degrees, and setting the speed somewhere between 25 – 75. Clicking on the number box next to each joint number will display a slider which you can use, or you can enter the number using your keyboard.
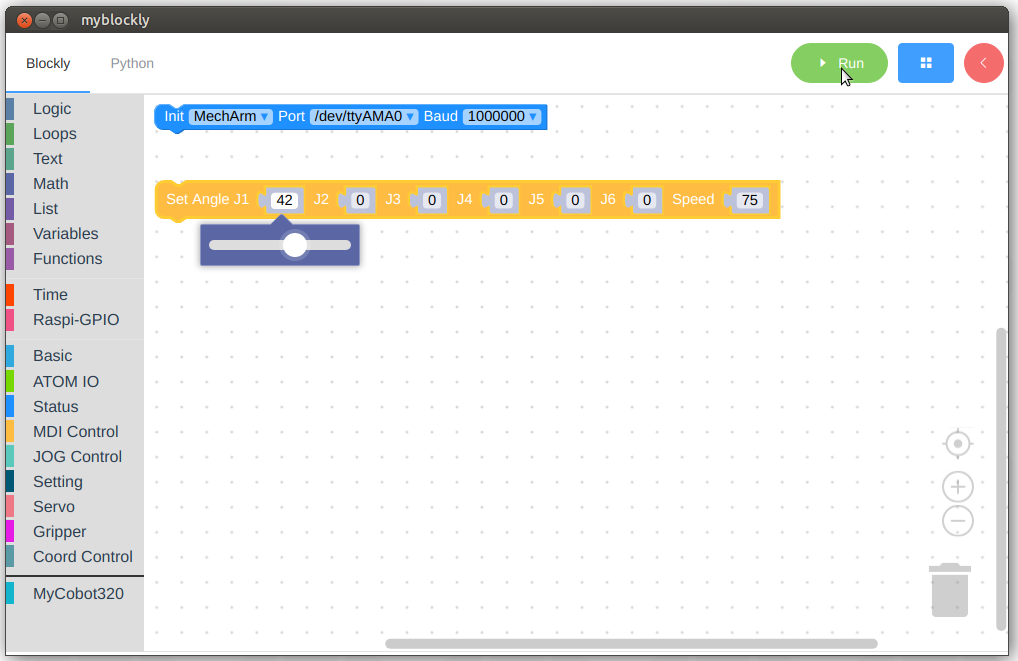
CAUTION: The next action will cause the Mecharm to move if everything is set up correctly. On the first try, I made sure there was 3 ft of clear space all the way around the robot, so an unexpected motion wouldn’t cause a collision.
Click on the green Run button at the top right corner of the app screen.
If the robot moved, congratulations! (If it did not, there may be a communication issue; start by checking port and baud settings. Upcoming posts will go into re-installing the Pi system image, which I needed to do to get the ROS2 environment working)
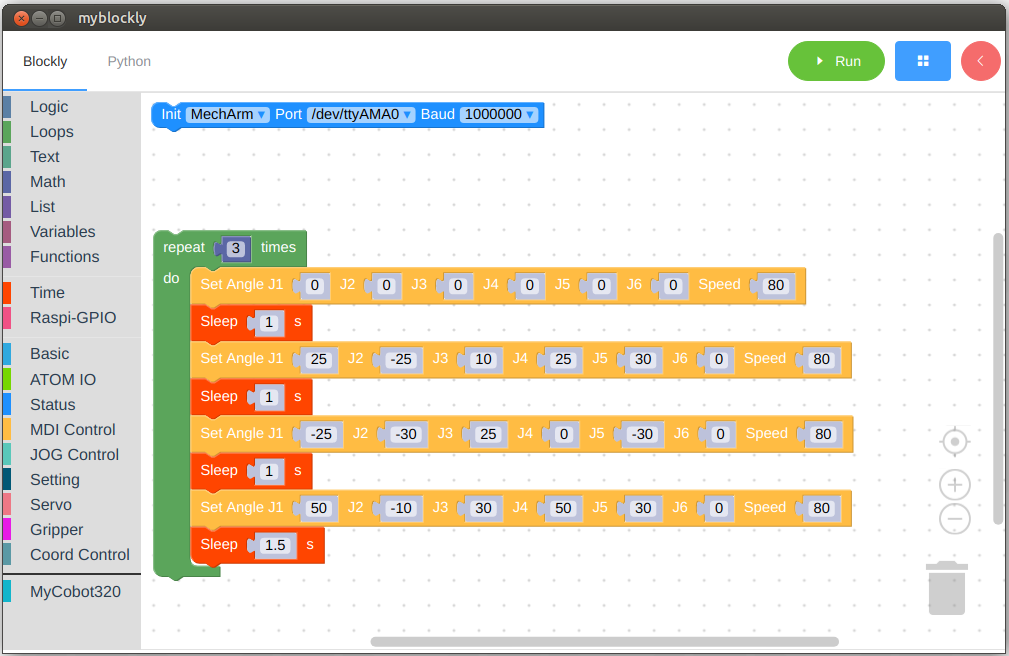
Now you can experiment with myBlockly to create a short program. Call the Sleep function, located in the Time tab on the left hand menu, to introduce delays. I have found that a delay is needed between motions, or the robot skips motions; it moves from one motion to the next before the first motion is completed, and skips the next instruction.
Here is a simple movement sequence using different joint angles and a speed of 80%.
The .json file is available on RoboFiesta LLC’s Github here
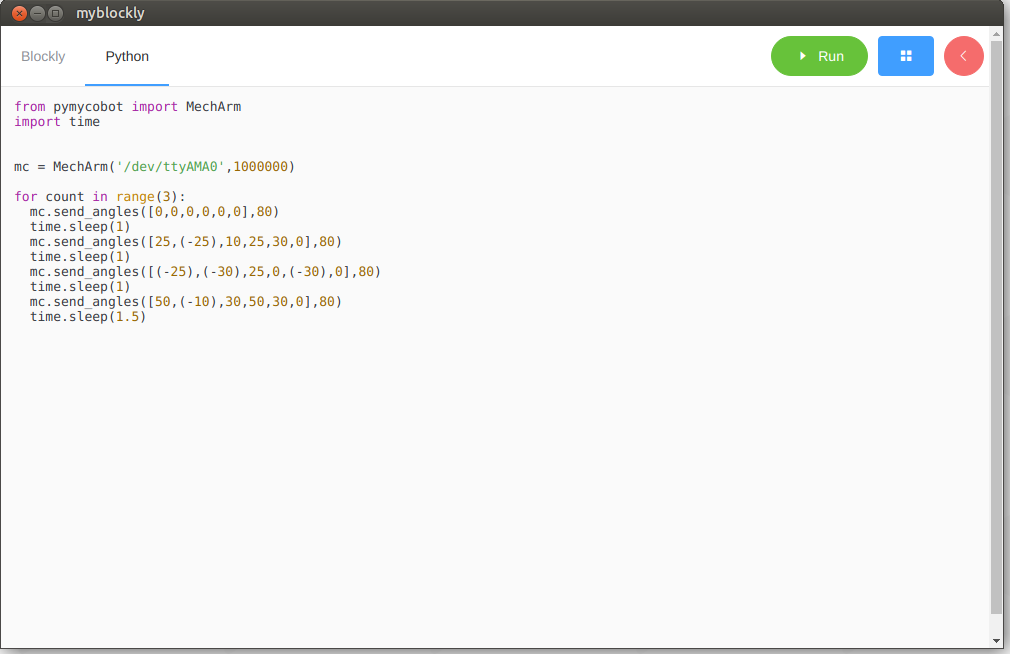
Choose the Python tab to see what the code looks like in Python:
And that’s it for the get-your-mecharm-to-move-for-the-first-time blog.
Here’s the video summarizing these instructions:
Next up, I get very frustrated trying to get the ROS2 environment running on my Mecharm….
Product Links
Elephant Robotics MechArm270 Pi
MechArm 270 Gripper
Green Printer Filament:
Gizmo Dorks 3mm ABS Green
Black Printer Filament:
Gizmo Dorks 3mm ABS Black
Blue Printer Filament:
Gizmo Dorks 3mm ABS Blue
https://amzn.to/3VzdsOj
Brown Printer Filament:
Gizmo Dorks 3mm ABS Brown
Clear Printer Filament:
Gizmo Dorks 3mm ABS Clear
https://amzn.to/3RjaATi
Red Printer Filament:
Gizmo Dorks 3mm ABS Red
3D Printer
We highly recommend the Flashforge line of 3D printers for printing your robotic EOAT and staging parts:
FLASHFORGE 3D Printer Guider II Large Size Intelligent Industrial Grade 3D Printer
FLASHFORGE Guider IIS 3D Printer Auto Leveling with High Temperature Nozzle
FLASHFORGE Adventurer 5M Pro 3D Printer with 1 Click Auto Printing System
FLASHFORGE Adventurer 5M 3D Printer with Fully Auto Leveling
FLASHFORGE 3D Printer Adventurer Series with Auto Leveling with Quick Removable Nozzle
Disclaimer: As a participant in the Amazon Affiliate program, we earn a small commission if you make a purchase through one of these links, at no additional cost to you.