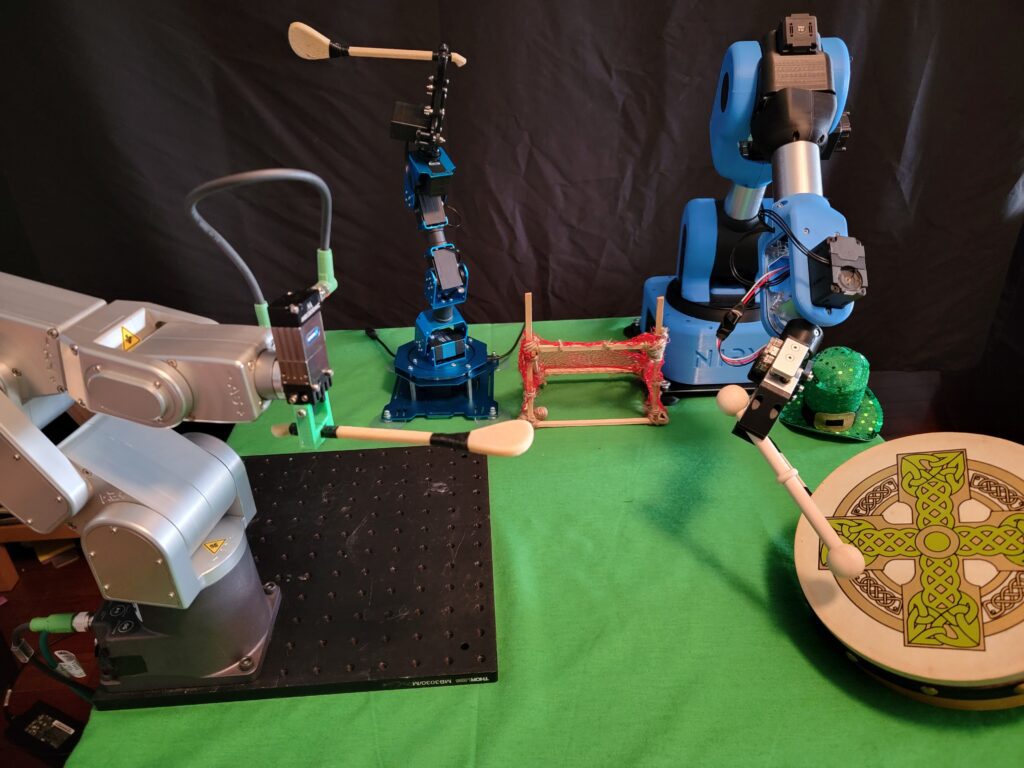
Playing around with TCP settings on the Mecademic one day, and this morphed into the thought that it would be fun to have a robotic sporting match to showcase this very useful function.
Basketball was out (couldn’t figure out how to dribble the ball repeatably), and soccer didn’t seem practical given the lack of legs in the participants. Irish Hurling came to mind while contemplating ice hockey (the hurley and the hockey stick have vaguely similar shapes).
Ok, so we have the sport identified, now what about props… The first time I watched a hurling match, I was sure the hurleys must have a scoop-type feature to keep the sliotar in place as the players raced up and down the field. The face of the hurley is in fact NOT concave, it’s the skill of the hurlers (camogie-ers?) and the slightly raised stitching on the sliotar that keeps it in place. It’s as if the players have their own TCP functions to keep the center point firmly in the middle of the flattened end of the hurley!
Here’s a great YouTube video from GAA MAN with players demonstrating their hurling skills: https://youtu.be/44Gi2IarBiI
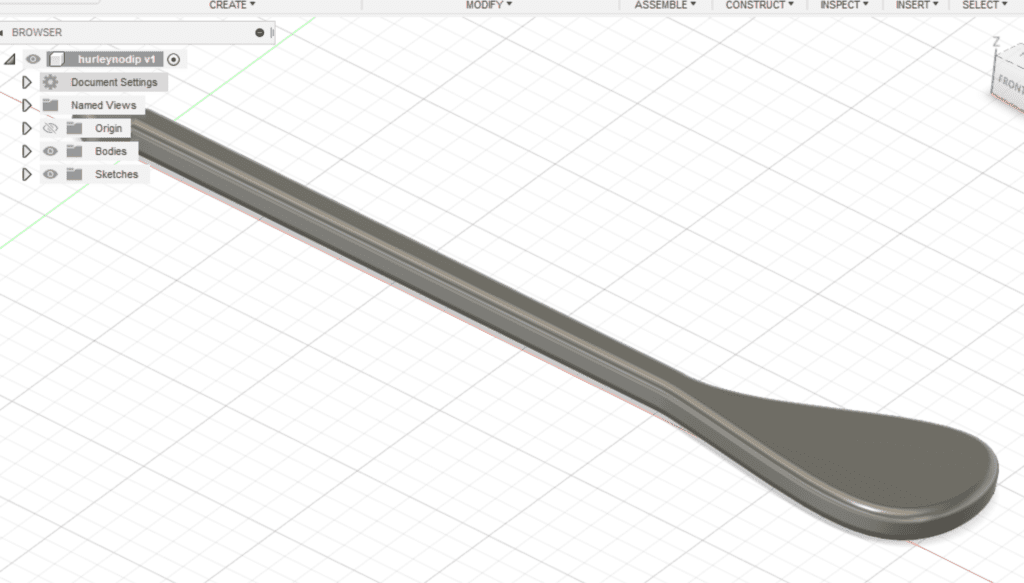
Amazingly enough, miniature hurleys and sliotars aren’t for sale on Amazon or Etsy (and I did a lot of searching). Looking at some online images, I designed a model hurley in AutoDesk 360 that at least keeps the shape, if not proportions, of the real thing. Here’s a great intro to AutoDesk Fusion 360 if you’re not already a user: AutoDesk Fusion 360
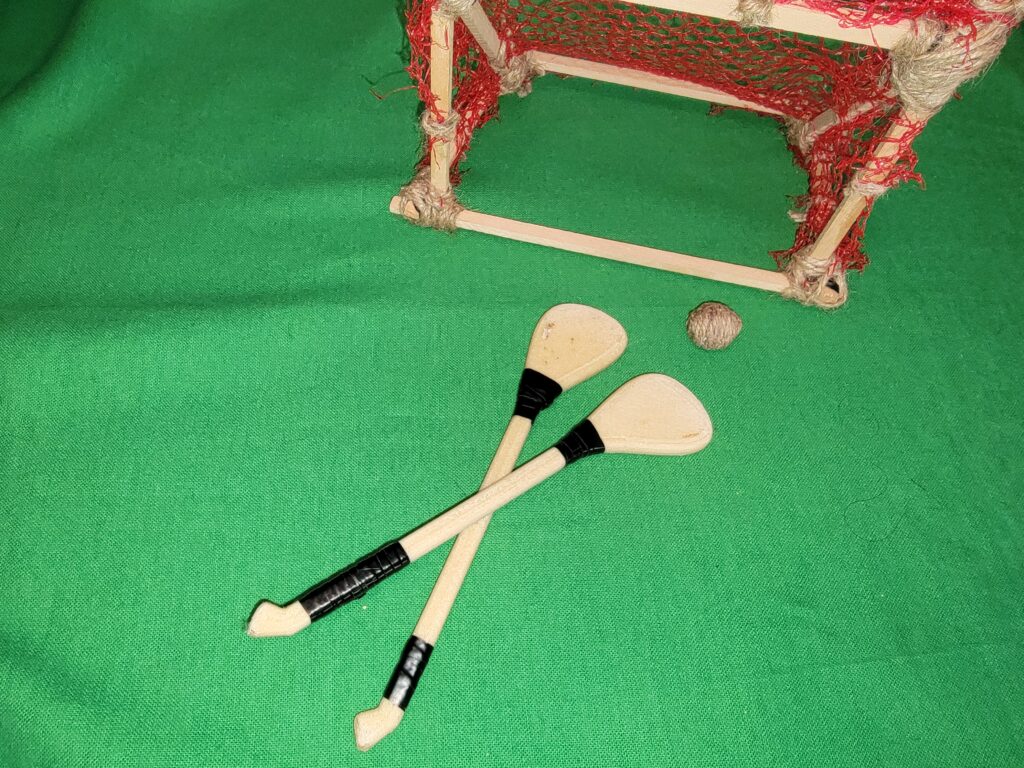
I ended up printing the hurleys both ways; in the video, the Mecademic’s hurley is flat while Neds and the xArm’s have one flat, and one concave side.
The hurley strapping is electrical tape.
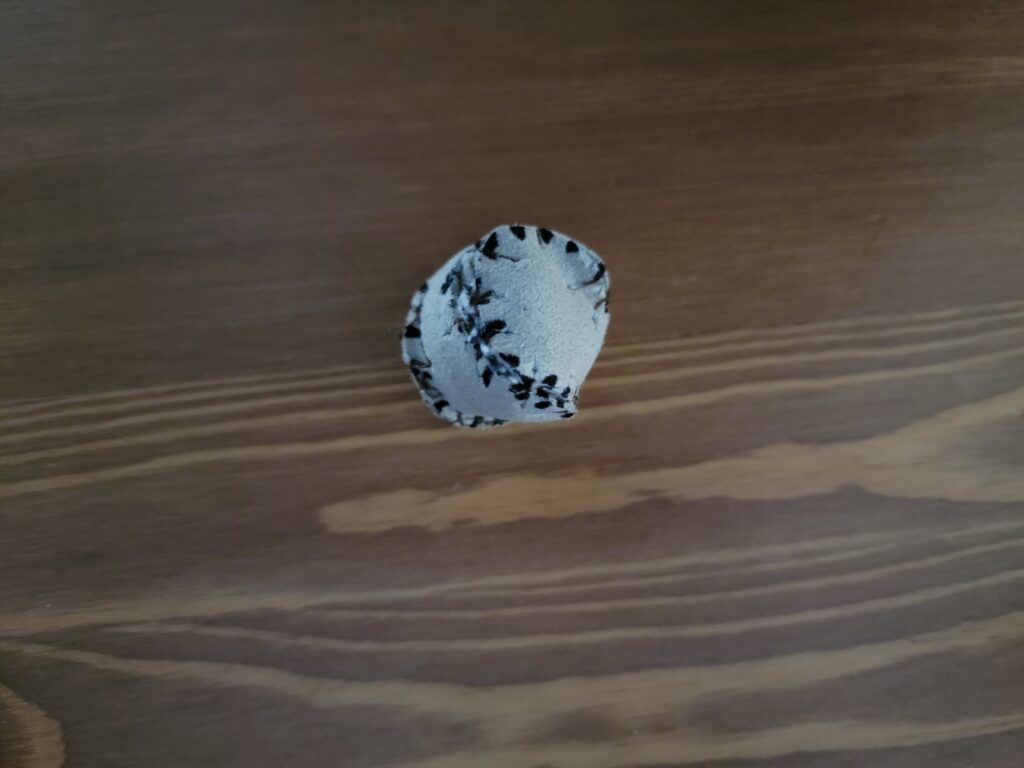
OK, now for the sliotar… I spent an inordinate amount of time trying to stitch a tiny canvas ball, but the material shredded in places. Next, I cut up an old pair of leather gloves and tried sewing a leather one using a tiny baseball pattern. It turned out more square than spherical:
Ned actually liked this one best; it didn’t roll at all, so was easier to hold on the hurley.
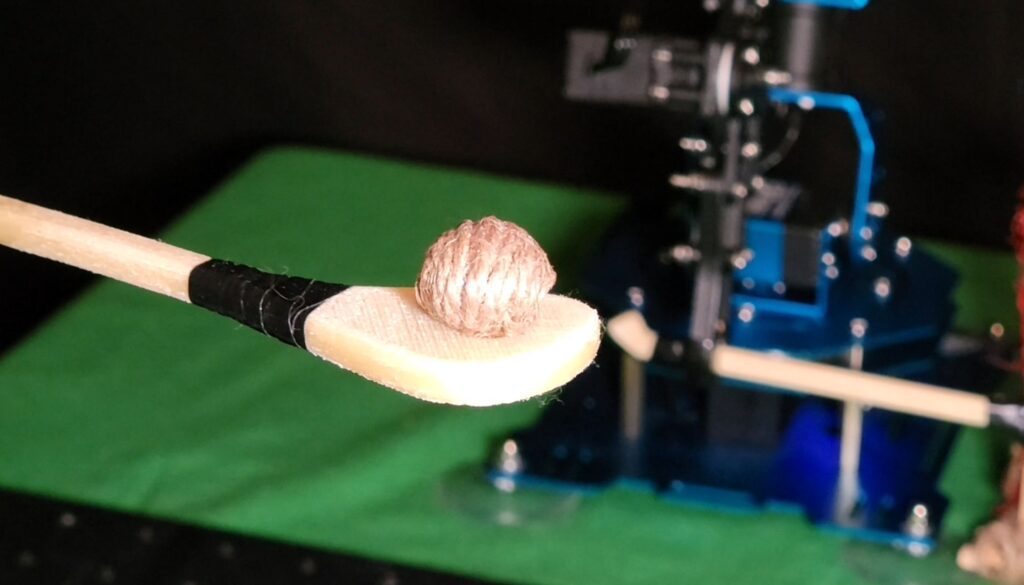
The final sliotar was a design based on some historical sliotar images on the National Museum of Ireland’s website. They were made of cow or horse hair. A ball made of coarse twine seemed about as close as I was going to get; once the glue set, it was hard and rolled reasonably well.
The goal was cobbled together using twine and mesh netting on a wooden frame.
Programming the winning goal motion on the Mecademic was a challenge; suffice to say, acceleration settings were key. Once the proper settings were found, though, Mike made the goal in ~ 75% of the shots. Here’s the final program used in the video:
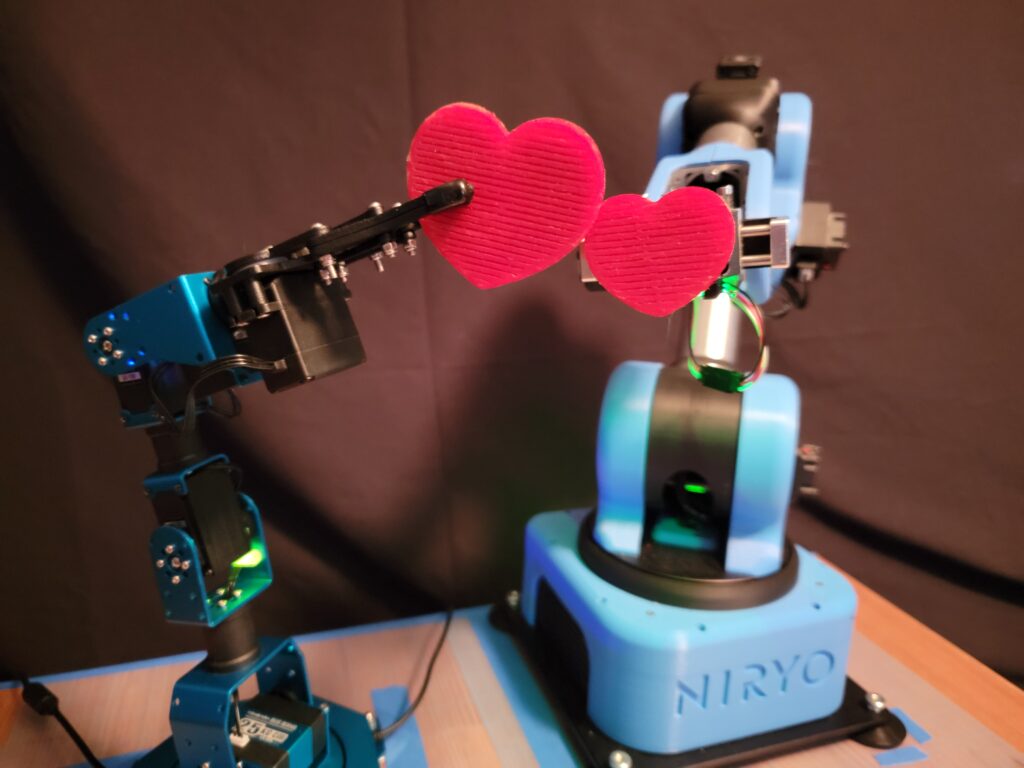
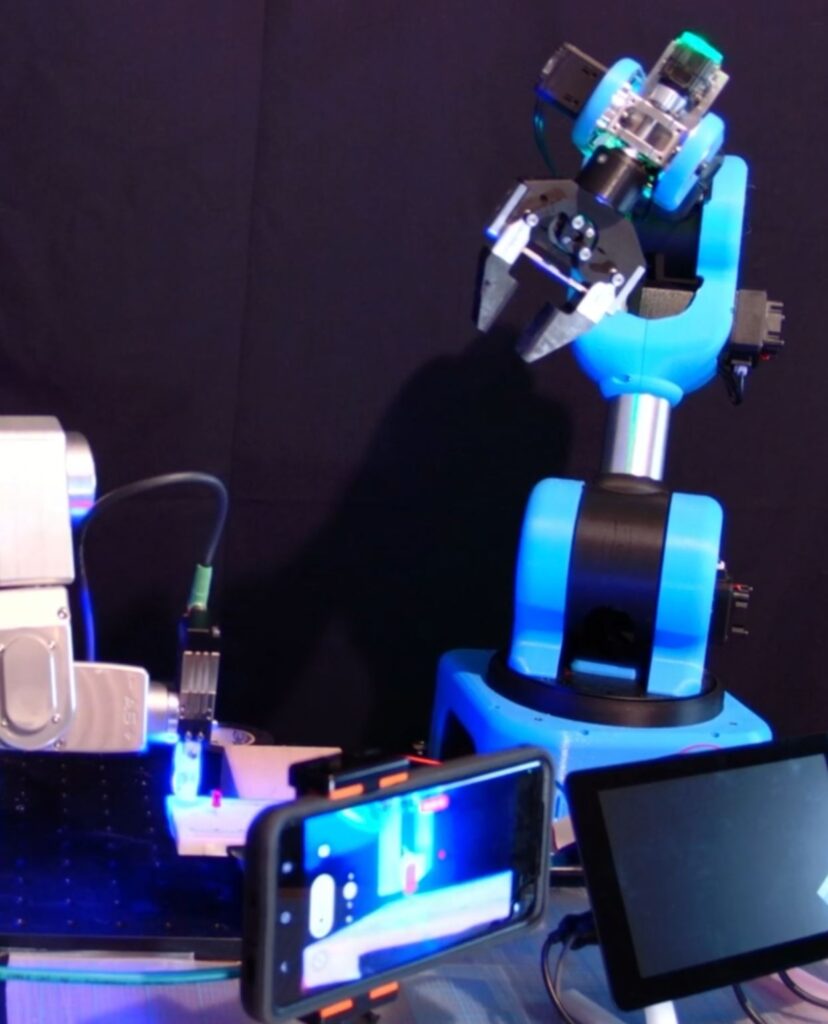
Ned has a new friend! The HiWonder Xarm is a fun little educational robot which you can buy assembled or in a kit. We thought it would be fun to see if the Xarm is repeatable enough to perform in a video alongside our Niryo Ned. It did very well for the price; at one stage, I needed to reteach some points that “wandered” for some reason but other than that it’s a great little robot. Note, the Xarm is really more of a 5-axis than 6-axis robot; the 6th axis is the gripper jaws, which does limit some of the positioning but Ned was able to work around this.
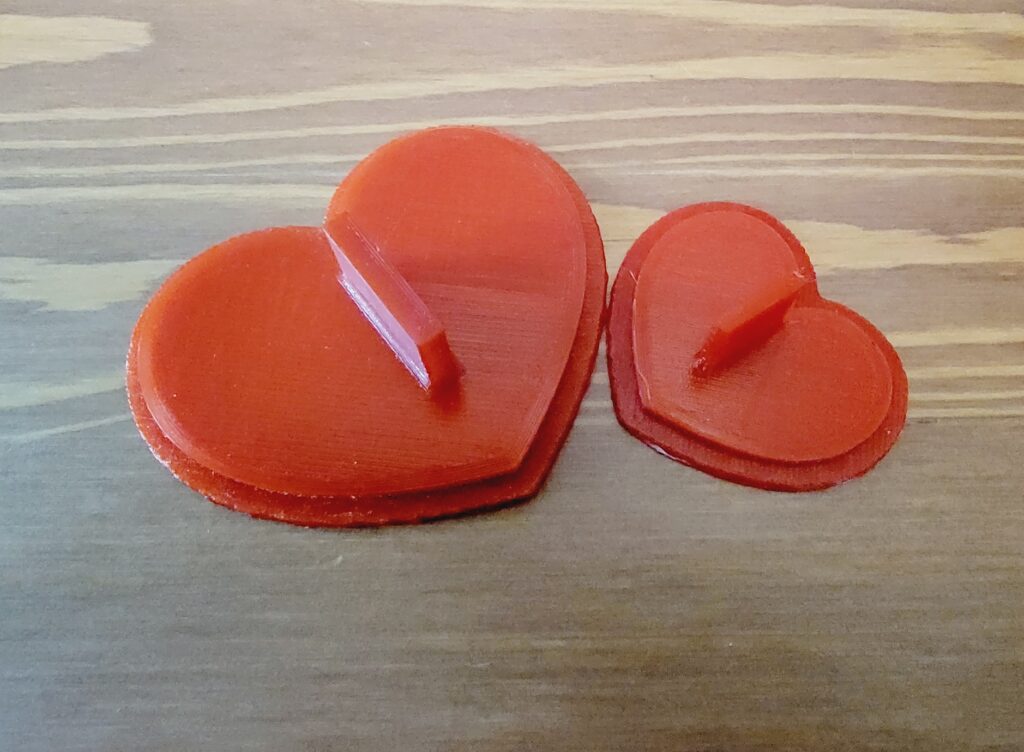
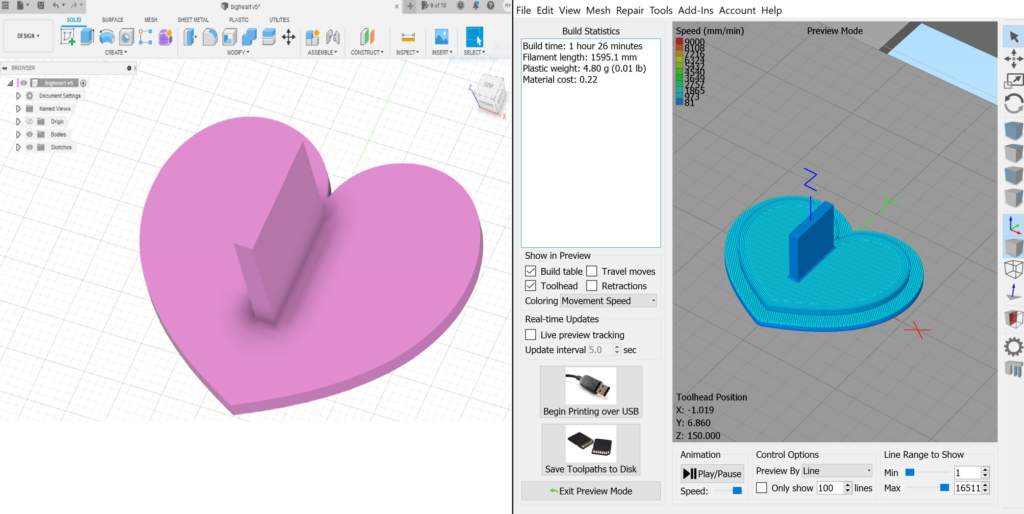
For props, I designed a simple heart shape with a grip and printed it on our FlashForge Creator Pro. Resized for the smaller heart, repeat. Slicing done on Simplify3d.
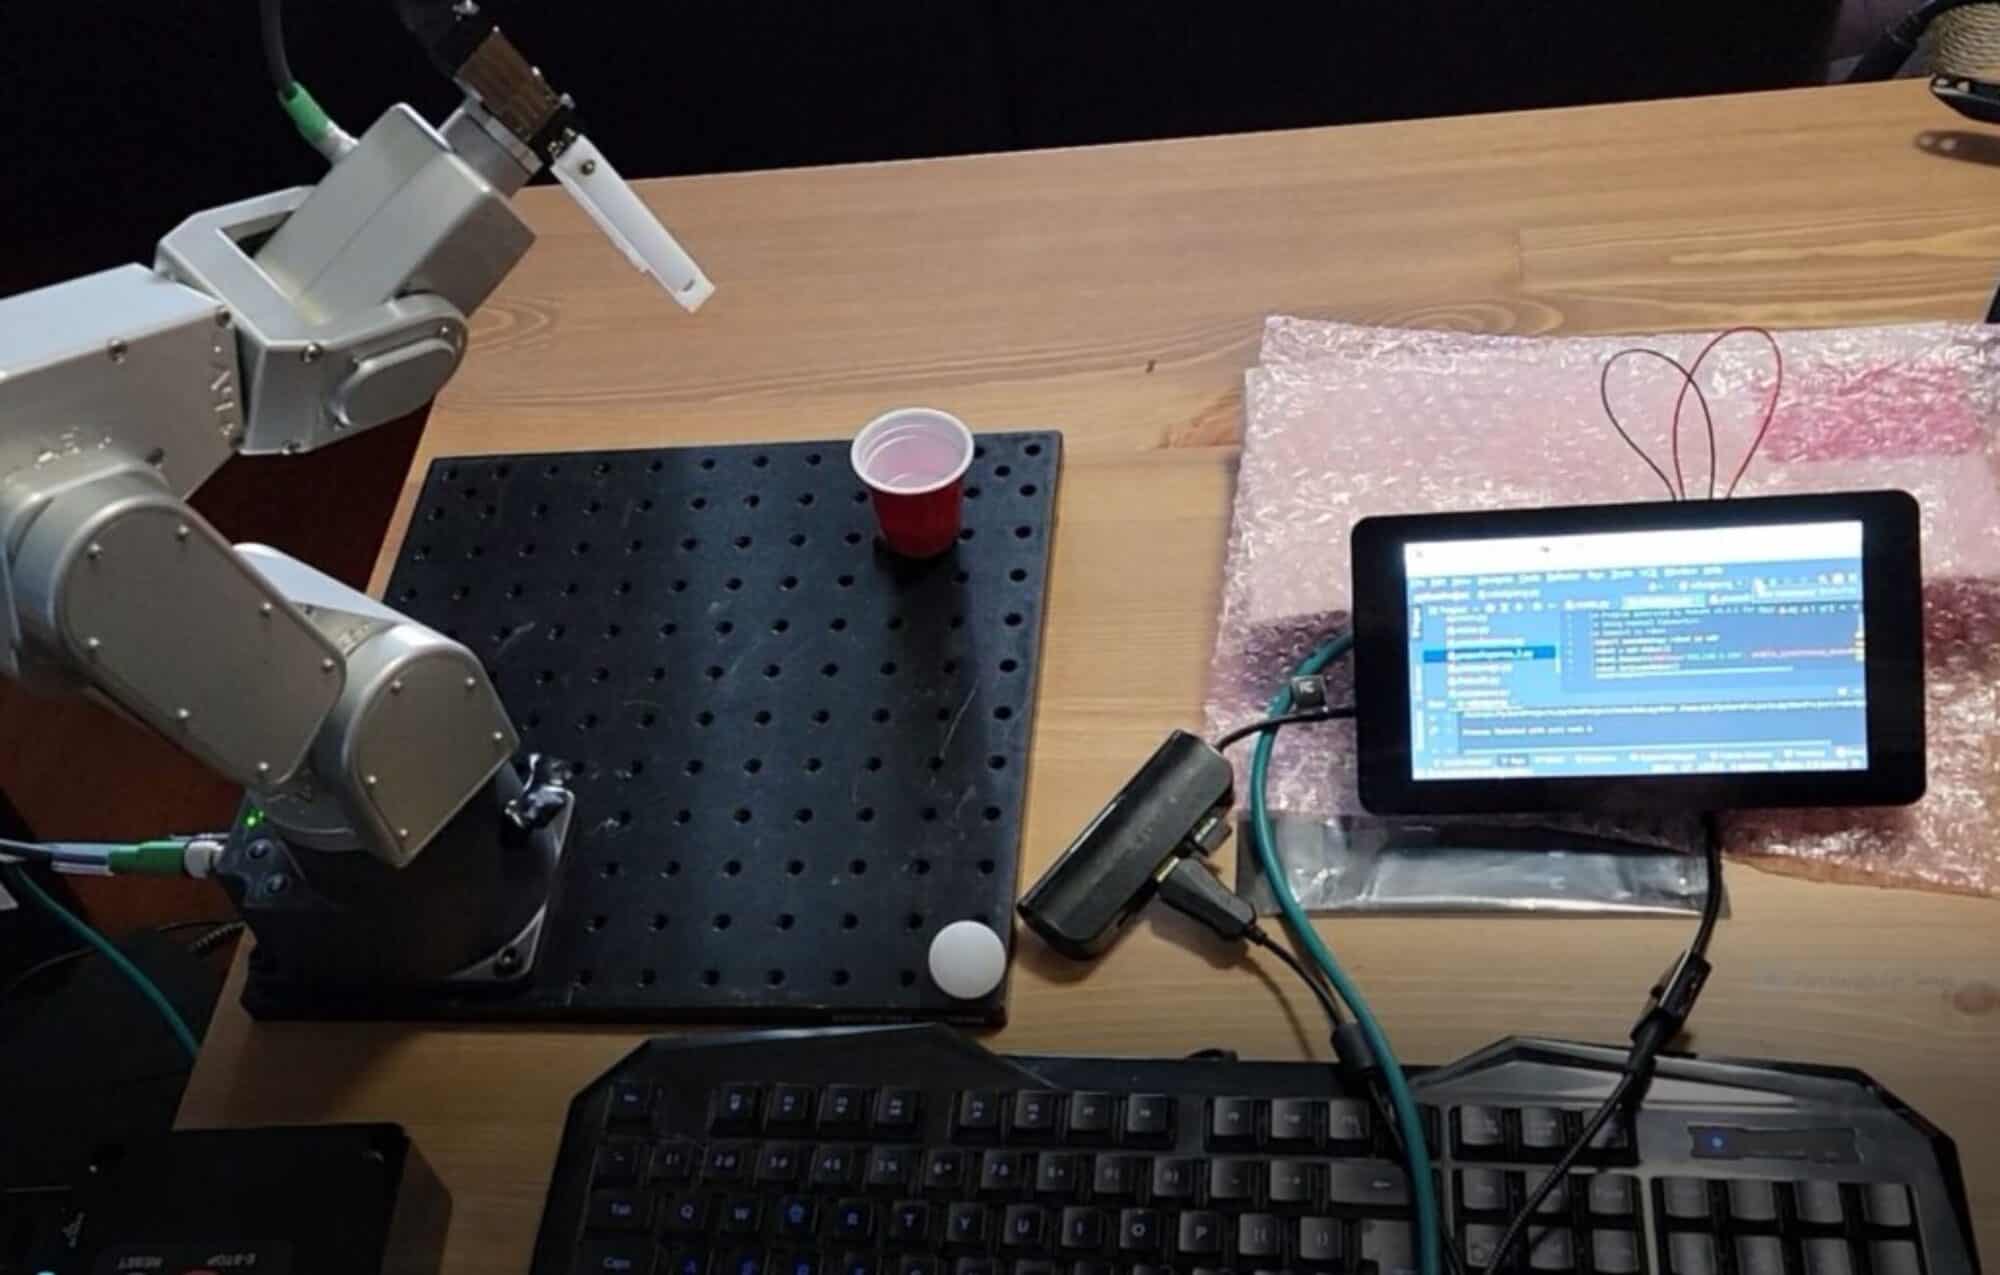
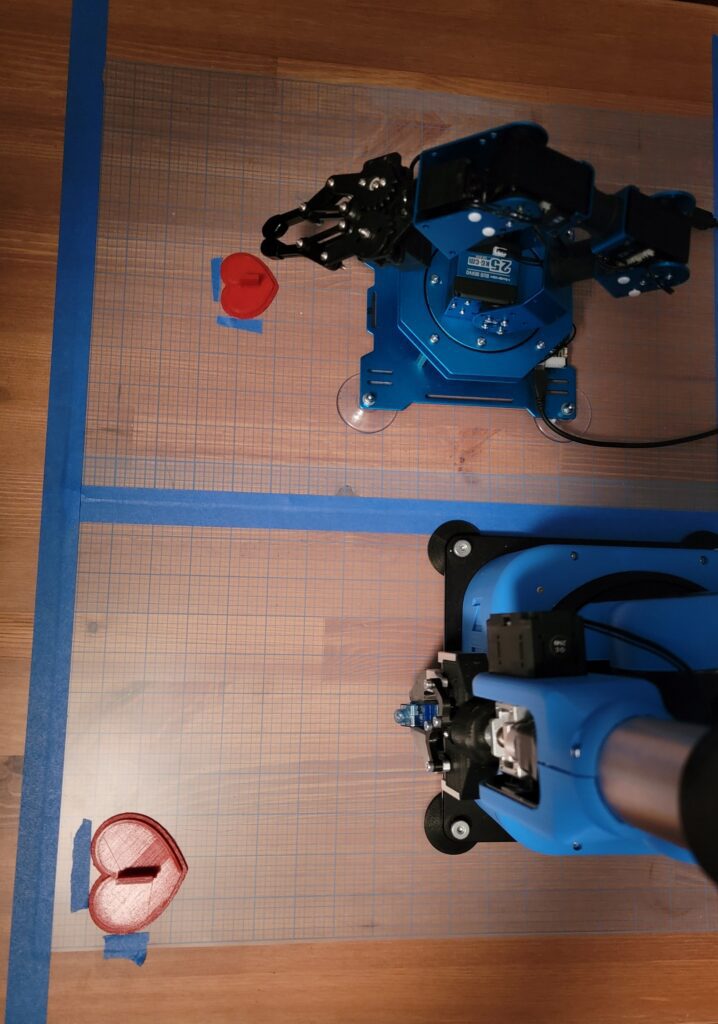
In any setup where pre-stage is the locating method, it’s important to know where your robots & parts are. I used a couple of plastic grids which are inexpensive and reusable; they’re sold as quilting accessories.
Using a grid for repeatable prestaging
We repeated the exchanging-of-valentines action over two dozen times; occasionally it didn’t work out (there was some variability where Ned put down the small heart, and occasionally the pencil stuck in his gripper jaws), but overall I was really happy with the sequence. The video featured on RoboFiesta’s Youtube channel was shot on a Samsung Galaxy S21 Ultra 5G, which has awesome media production capabilities. Edited on Adobe’s Premier Pro.
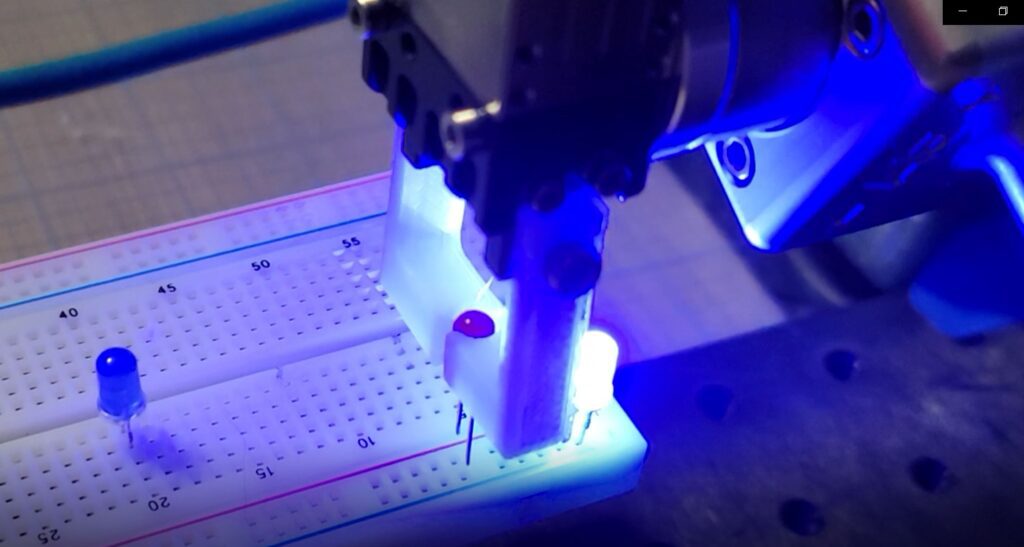
With 5um repeatability, the Mecademic 500 is uniquely suited for applications requiring a high degree of precision. Prestaging of components is key, however, when using purely motion with no vision or dynamic location. The CanaKit Raspberry Pi breadboard provides a good stage for this work, which could be adapted for backloading & soldering manufacturing applications. Watch the video here.
Battered Diode
Word of warning- have a few “burner” parts for use during setup. Once the diode legs get bent they are difficult to straighten!
It’s difficult to see, but the robot performs a “shimmy” action as it places the 2 diodes. This utilized the Mecademic’s ability to jog in very fine increments when building the program- in this case, 0.05mm and finer. This motion was to offset the variance in prestage presentation of the diodes, and the spring memory in the fragile diode legs. The program is included below.